この記事の目次
事前準備
MacOSでの開発を前提としますが、まずはMacOS用SDK※をインストールします。
※SDKとは、「Software Development Kit」(ソフトウェア開発キット)のこと
また、iOSアプリの開発を実施する場合はXcode、Androidアプリの開発を実施する場合はAndroid Studioも合わせて準備が必要になります。
今回はiOSとAndroidの両方とも対応出来るようにそれぞれの環境構築を実施していきます。
MacOS用SDKをインストール
開発を実施するために必要なSDKの準備には、以下の2通りのやり方が存在します。
①公式サイトからダウンロードする
②Homebrewを使用してダウンロードとインストールする
それぞれ以下にやり方を記載しますが、普段からHomebrewを使用している場合は②のHomebrewで実施してしまった方がやりやすいかと思います。
Homebrewを知らない人は、この機会に覚えておくと今後の開発時にも役に立つかと思います!
①公式サイトからダウンロードする方法
- https://flutter.dev/docs/get-started/install/macos
- 2021/09/05現在は2.2.3が最新
- 上記リンクからzip形式のファイルをダウンロードし、unzipしてSDKのパスを通す。
# 開発用ディレクトリに移動
$ cd ~/[[your_development_directory]]

# unzipを実施
$ unzip ~/Downloads/flutter_macos_2.2.3-stable.zip

# 利用しているログインシェルのパス設定を追加
$ vim ~/.zshrc
## 以下の行を追記
export PATH="/usr/local/bin/flutter/bin:$PATH"

# ログインシェルの設定を反映
$ source .zshrc
②Homebrewを使用してダウンロードとインストールする方法
- 以下のコマンドを実施する。
$ brew install --cask flutterFlutter Toolをダウンロード
上記の手順でflutter SDKをインストールしたら、flutterのツール群を準備します。
$ flutter precache開発に必要なソフトウェアが揃っているか確認
flutterには足りていない設定やソフトウェアが無いか確認するコマンドがあります。
最初に以下を実施してください。
$ flutter doctor私は既に開発ツールとしてIntelliJやVSCodeはインストール済みのため、以下のような結果になりました。
(それ以外にも実施者の環境によって結果は異なります。)
Doctor summary (to see all details, run flutter doctor -v):
[✓] Flutter (Channel stable, 2.2.3, on Mac OS X 10.15.7 19H1323 darwin-x64, locale ja)
[✗] Android toolchain - develop for Android devices
    ✗ Unable to locate Android SDK.
      Install Android Studio from: https://developer.android.com/studio/index.html
      On first launch it will assist you in installing the Android SDK components.
      (or visit https://flutter.dev/docs/get-started/install/macos#android-setup for detailed
      instructions).
      If the Android SDK has been installed to a custom location, please use
      `flutter config --android-sdk` to update to that location.

[✗] Xcode - develop for iOS and macOS
    ✗ Xcode installation is incomplete; a full installation is necessary for iOS development.
      Download at: https://developer.apple.com/xcode/download/
      Or install Xcode via the App Store.
      Once installed, run:
        sudo xcode-select --switch /Applications/Xcode.app/Contents/Developer
        sudo xcodebuild -runFirstLaunch
    ✗ CocoaPods not installed.
        CocoaPods is used to retrieve the iOS and macOS platform side's plugin code that responds to your
        plugin usage on the Dart side.
        Without CocoaPods, plugins will not work on iOS or macOS.
        For more info, see https://flutter.dev/platform-plugins
      To install see https://guides.cocoapods.org/using/getting-started.html#installation for
      instructions.
[✓] Chrome - develop for the web
[!] Android Studio (not installed)
[✓] IntelliJ IDEA Ultimate Edition (version 2019.3.4)
[✓] VS Code (version 1.41.1)
[✓] Connected device (1 available)

! Doctor found issues in 3 categories.
「✗」と「!」印が付いているものが対応すべきものになるため、この環境においては以下3つが足りていないということが分かります。
Android toolchain
Xcode
Android Studio
それぞれ対応していきます。
Android用のset up実施
- https://flutter.dev/docs/get-started/install/macos#android-setup
- 「Android setup」部分を実施します。
- Android studioをダウンロード、インストール
- https://developer.android.com/studio
- 指示に従ってコンポーネントをダウンロードする。
- 「flutter doctor」実施
- ライセンスが足りていないらしく、記載された以下のコマンドを実施
# Android用ライセンスを追加
$ flutter doctor --android-licenses

# 「NoClassDefFoundError」が発生「NoClassDefFoundError」が発生したのは、コマンドラインツールが入っていないことが原因らしい
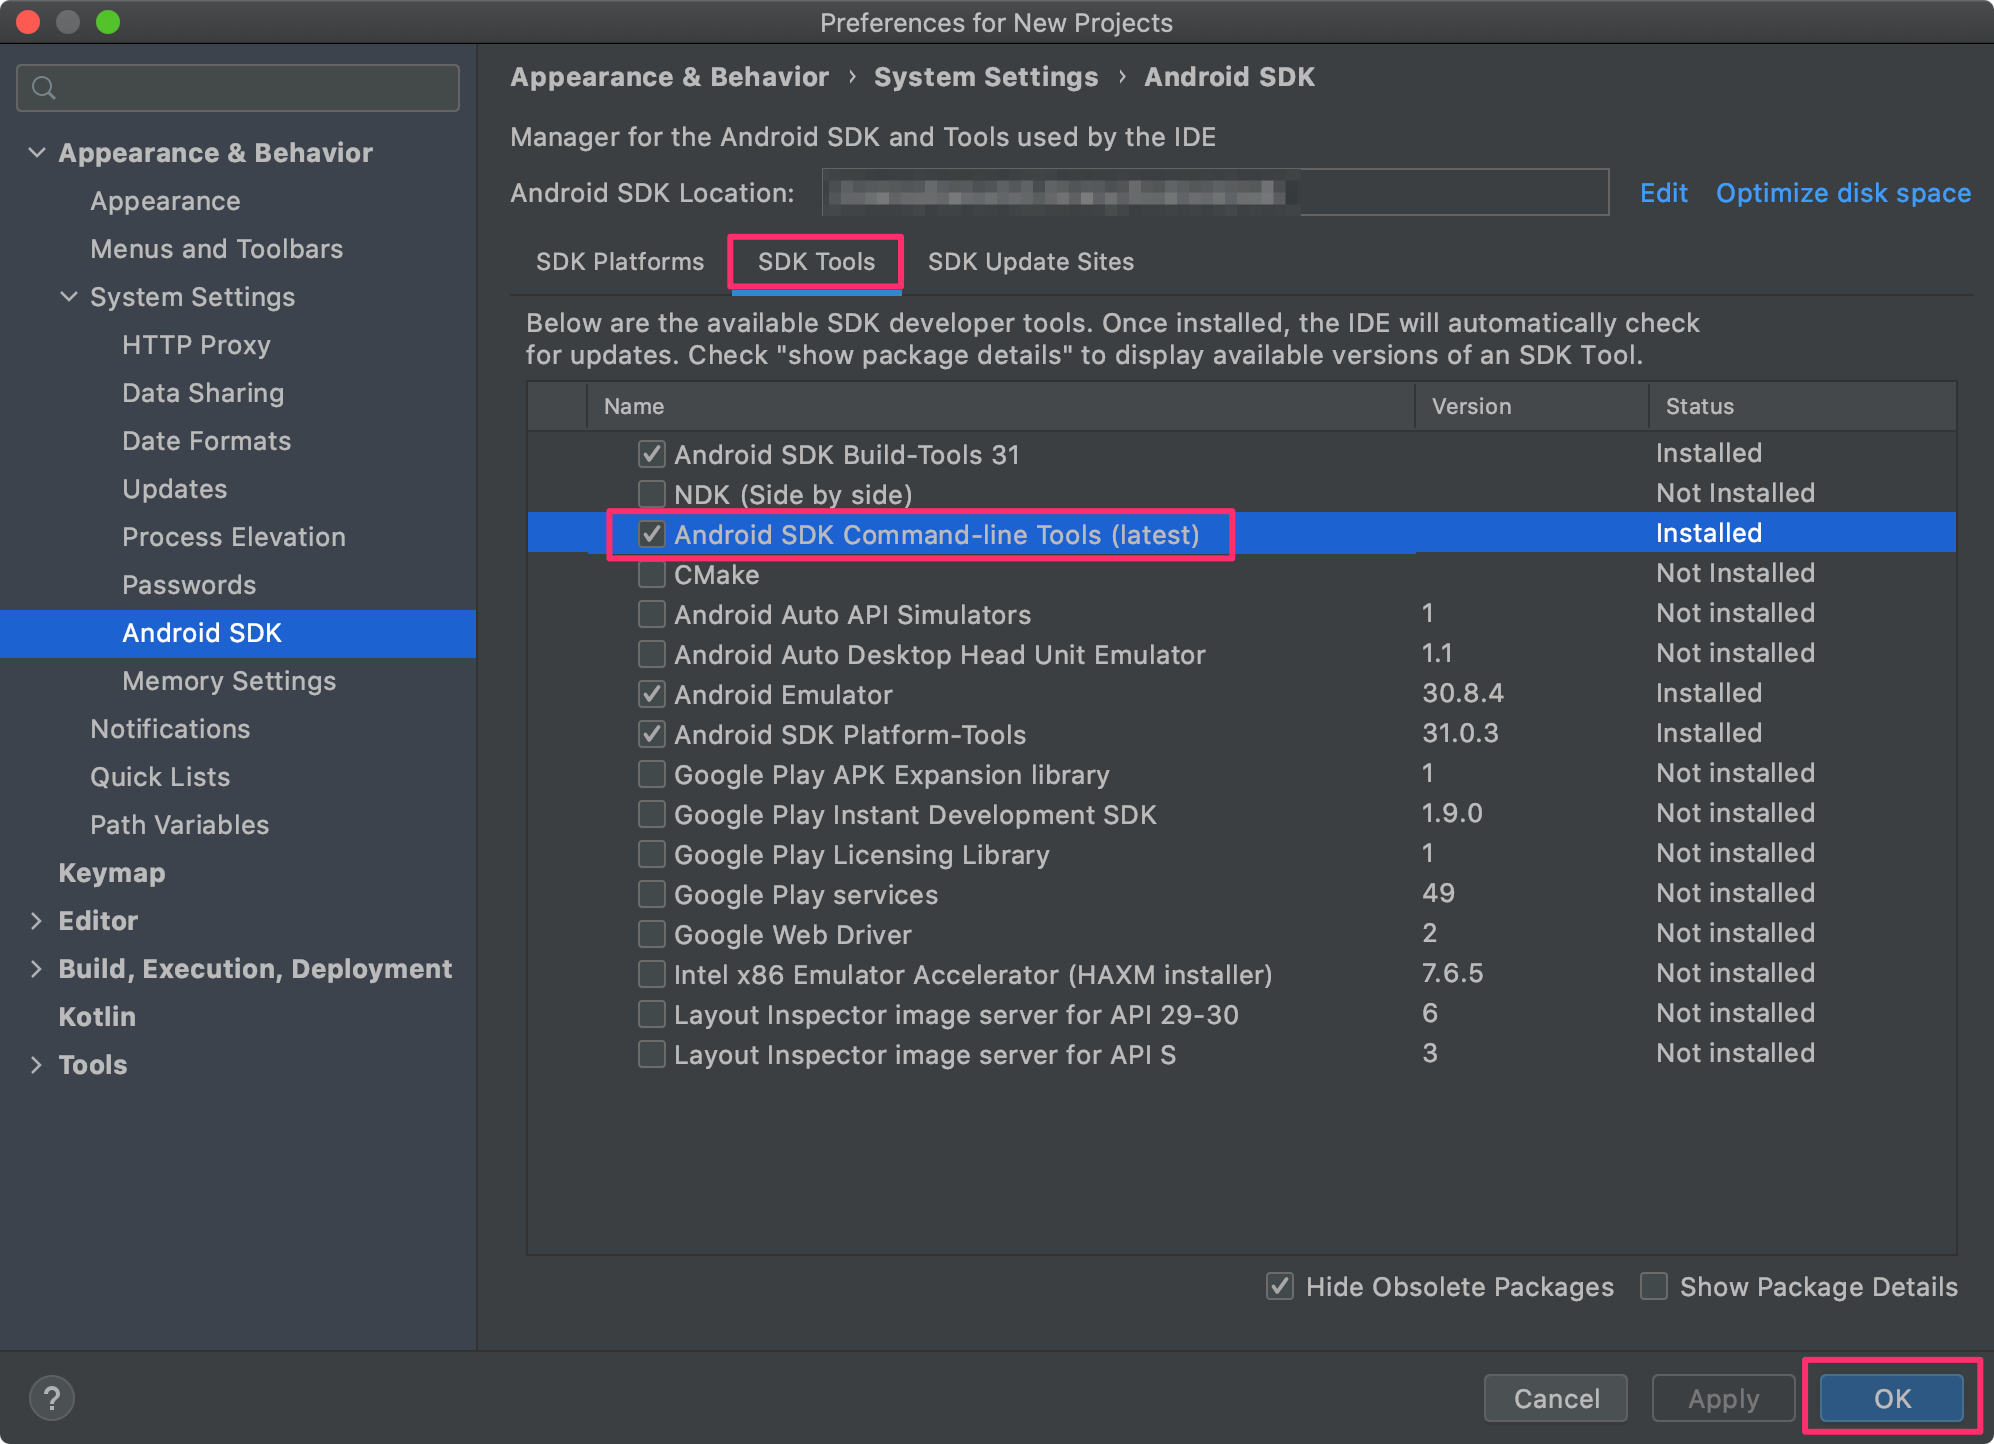
- Android SDK用ツールの追加インストールを実施
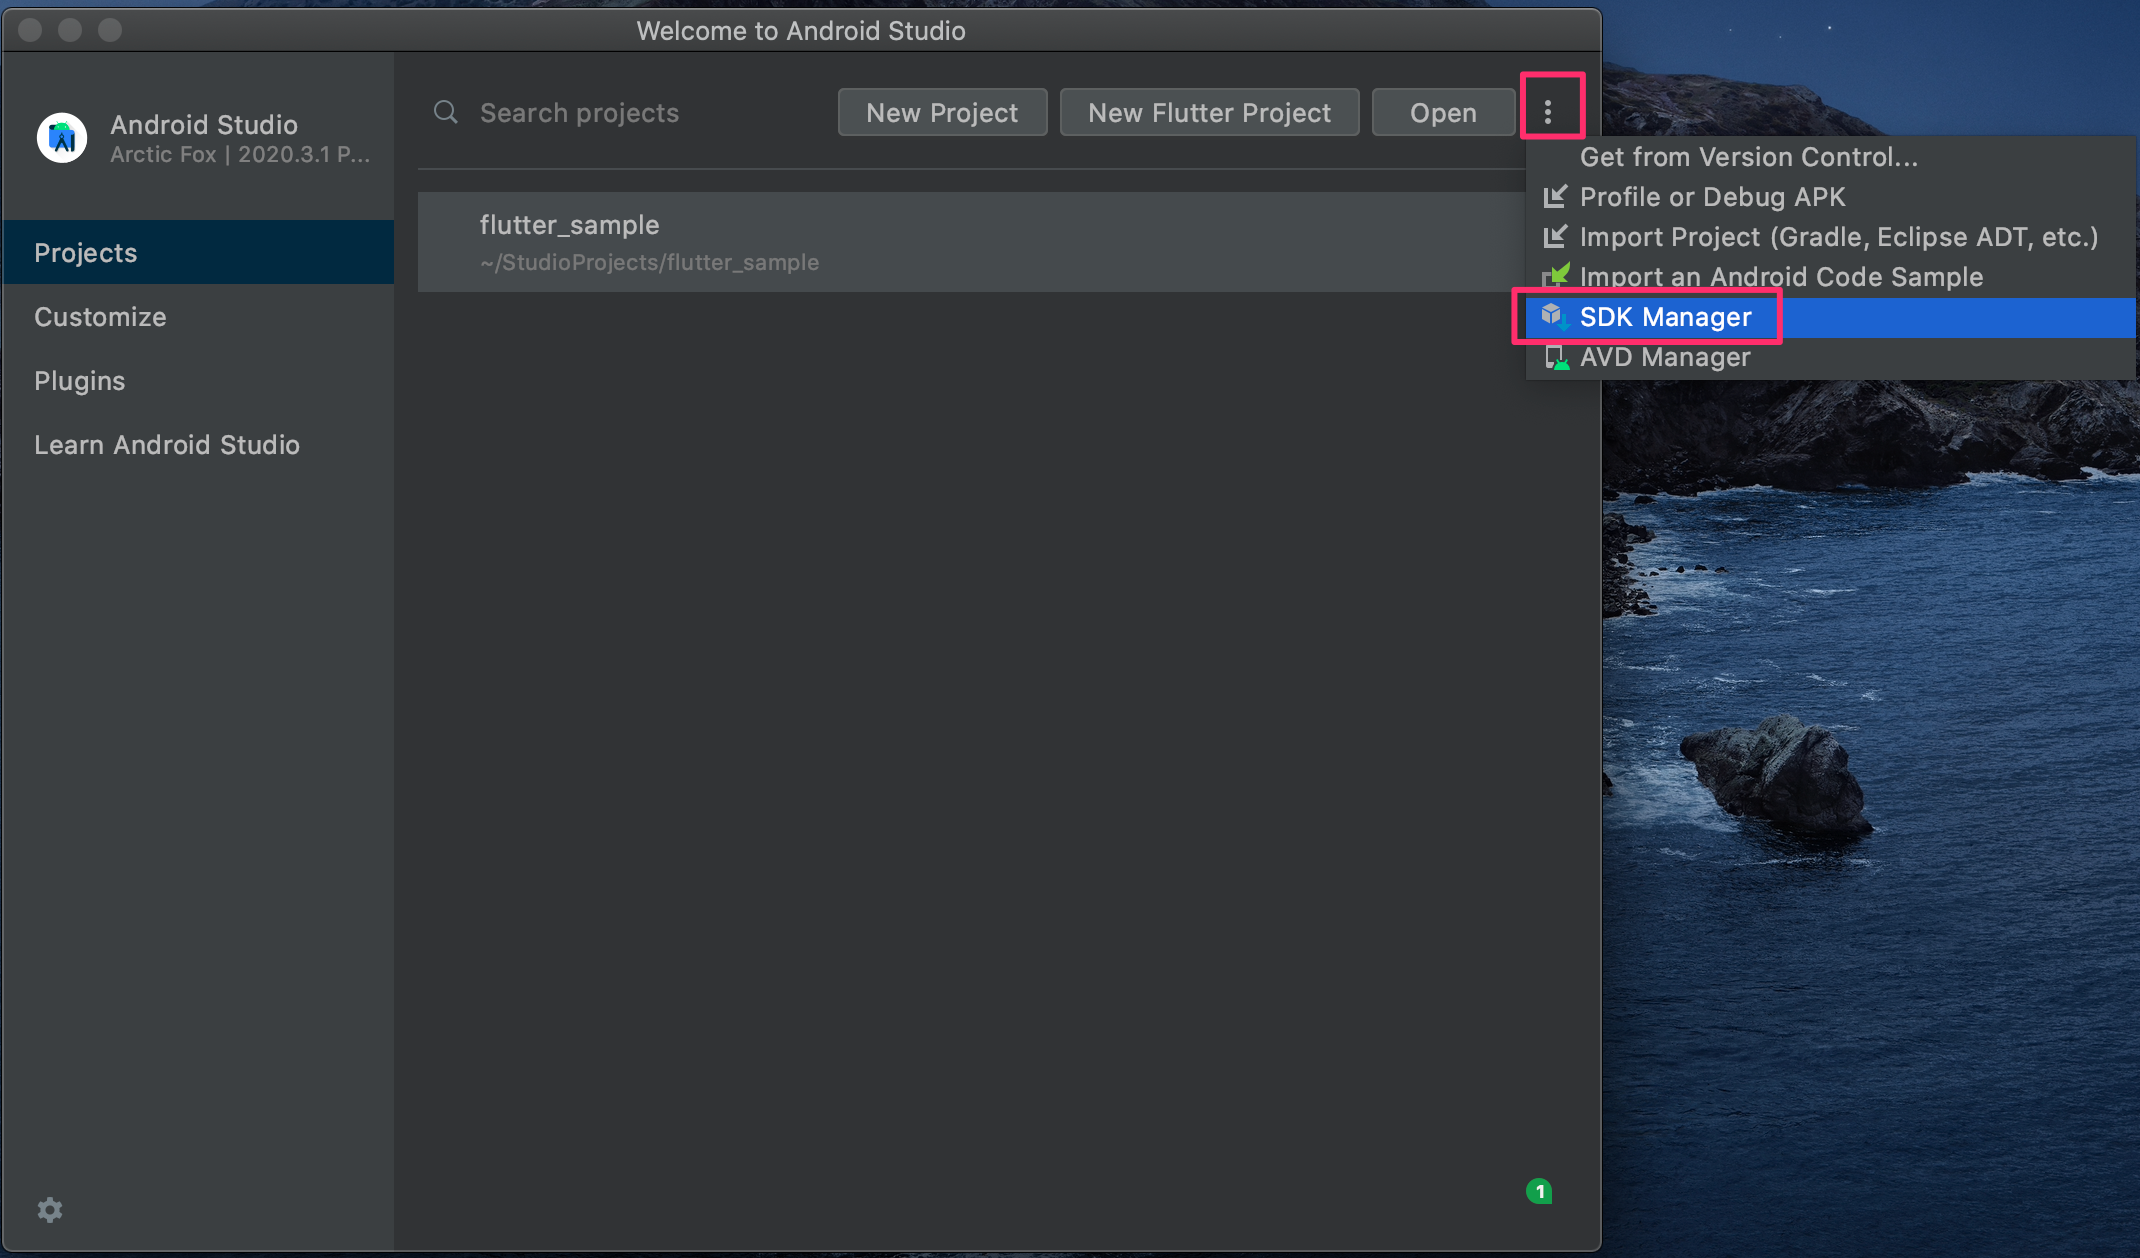
- Android Studioアプリを開き、「SDK Manager」を選択
- 「Command-line Tools」を追加
- Android Studioアプリを開き、「SDK Manager」を選択
- 再度Androidライセンスの取得を実施
$ flutter doctor --android-licenses

# ひたすらyを入力- 再度「flutter doctor」実施
- 「Android toolchain」部分はグリーンになったが、「Android Studio」部分が「!」のまま
- 以下を実施で良いらしい
$ cd /Applications/Android\ Studio.app/Contents/jre

$ ln -s ../jre jdk
$ ln -s "/Library/Internet Plug-Ins/JavaAppletPlugin.plugin" jdk「flutter doctor」を実施し、Android部分がオールグリーンになっていれば完了
iOS用のset upを実施

- Xcodeをインストール(※インストール時間が30分〜60分ほどと長いため実施タイミングには注意)
- 基本はApp Storeから実施で良いですが、最新OSじゃない場合は以下のwebから古いバージョンを取得します。
- https://developer.apple.com/download/all/
- 「flutter doctor」実施
- 「Xcode installation is incomplete; a full installation is necessary for iOS development.」でエラーが発生
- 記載されている以下コマンドを実施します。
$ sudo xcode-select --switch /Applications/Xcode.app/Contents/Developer
$ sudo xcodebuild -runFirstLaunch- 再度「flutter doctor」実施
- CocoaPodsというものが入っていないらしいので、以下コマンドを実施します。
$ brew install cocoapods「flutter doctor」を実施し、Xcode部分がオールグリーンになっていれば完了
まとめ
「flutter doctor」を実施し、以下の状態になっていたらiOSとAndroid用の環境構築は完了です。
Doctor summary (to see all details, run flutter doctor -v):
[✓] Flutter (Channel stable, 2.2.3, on Mac OS X 10.15.7 19H1323 darwin-x64, locale ja)
[✓] Android toolchain - develop for Android devices (Android SDK version 31.0.0)
[✓] Xcode - develop for iOS and macOS
[✓] Chrome - develop for the web
[✓] Android Studio (version 2020.3)
[✓] IntelliJ IDEA Ultimate Edition (version 2019.3.4)
[✓] VS Code (version 1.41.1)
[✓] Connected device (1 available)

• No issues found!
引き続き、チュートリアルの実施をしていきます。
以下の記事でまとめています。
